- Awards Tool
- Copying Content
- Syncing Gmail Calendar with eConestoga
- Syncing iCal with eConestoga
- Syncing Office365 Calendar with eConestoga
- eConestoga Community Shells
- Request Custom Shells
- End Dates & Controlling Course Visibility
- Enrollment & User Roles
- Keeping Your ePortfolio After You Graduate
- Grades Setup
- Merging Courses
- Publishing Your Grades
- Quiz Submission Views
- eConestoga Student Reference
- Special Access in eConestoga Quizzes
Our Guides Have Moved!
If you have bookmarks to our old guide site, please update them!
You can find this guide in its new location here:
Add Users to Groups
Add Users to Groups

Depending on how you set up your Groups, the system may or may not enroll students in your groups automatically. If it doesn't, you will need to place students into groups manually.
Add students to one group at a time
- Go to Course Tools > Groups.
- If you have more than one Category of Groups, choose the one you wish to modify using the View Categories drop-down box.
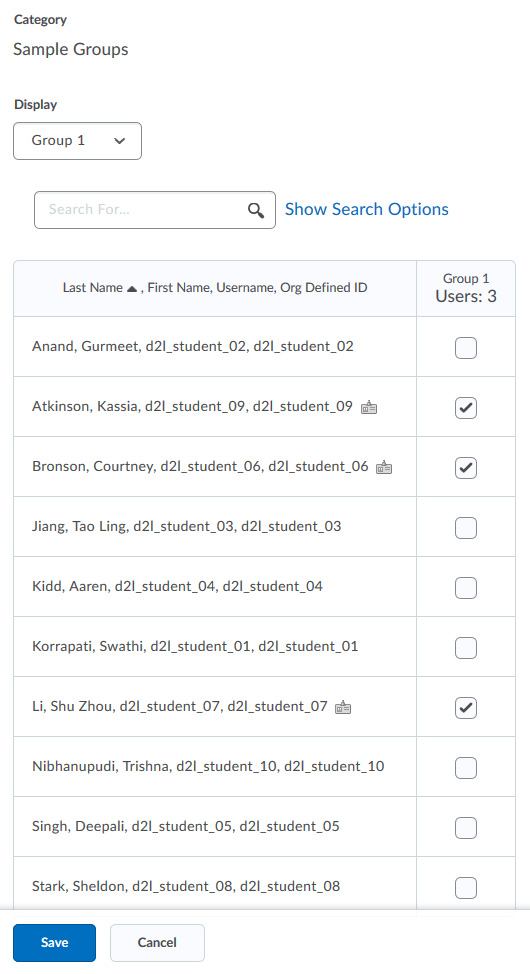
- Click the name of any group. On the next screen, click Enroll Users.
- You will see a table containing the names of all of your students, with a checkbox beside each one. Check the box beside the name of any student who should be in the currently-selected group.
- When you are finished, click Save at the bottom of the screen.
- Repeat steps 3 to 5 for each of your other groups.
Edit the memberships of all groups in a Category at once
- Go to Course Tools > Groups.
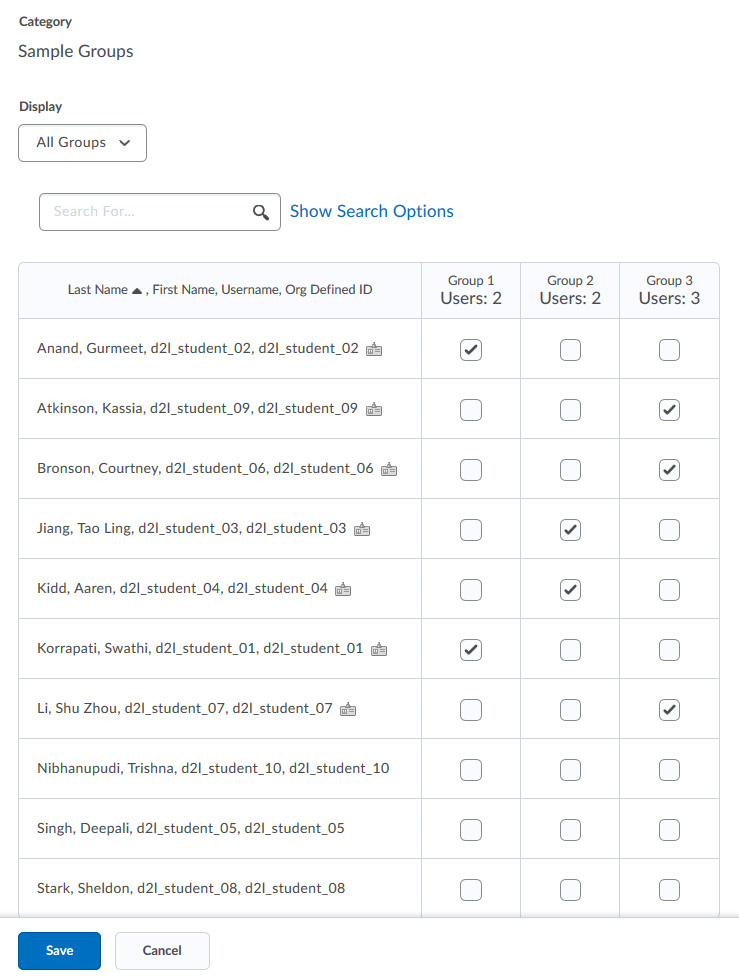
- Click the drop-down arrow beside the name of the Category of groups, and choose Enroll Users.
- You will see a table containing the names of all of your students on the left, and a column of checkboxes for each of the groups in the current Category. For each student, check the box under the column corresponding to the group that student should be on.
- An icon will appear beside the name of every student who is enrolled in at least one group; you can check that no students were missed by scanning for students who do not have this icon.
- When you are finished, click Save at the bottom of the screen.
These same processes can be used to remove users from groups or to move students between groups - simply uncheck their names on the groups they should not be attached to, and check the box beside the new group they are moving to.
