- Awards Tool
- Copying Content
- Syncing Gmail Calendar with eConestoga
- Syncing iCal with eConestoga
- Syncing Office365 Calendar with eConestoga
- eConestoga Community Shells
- Request Custom Shells
- End Dates & Controlling Course Visibility
- Enrollment & User Roles
- Keeping Your ePortfolio After You Graduate
- Grades Setup
- Merging Courses
- Publishing Your Grades
- Quiz Submission Views
- eConestoga Student Reference
- Special Access in eConestoga Quizzes
Our Guides Have Moved!
If you have bookmarks to our old guide site, please update them!
You can find this guide in its new location here:
Bulk Download & Re-Upload
Bulk Download & Re-Upload
Instructors often wish to download students' submitted documents, annotate them offline, and then re-upload the marked-up documents for their students to view. This process can be done one document at a time, but a more efficient method is to download all submitted files at once, and then re-upload the entire set of files in a single package.
Bulk Download
- Go to Course Tools -> Assignments.
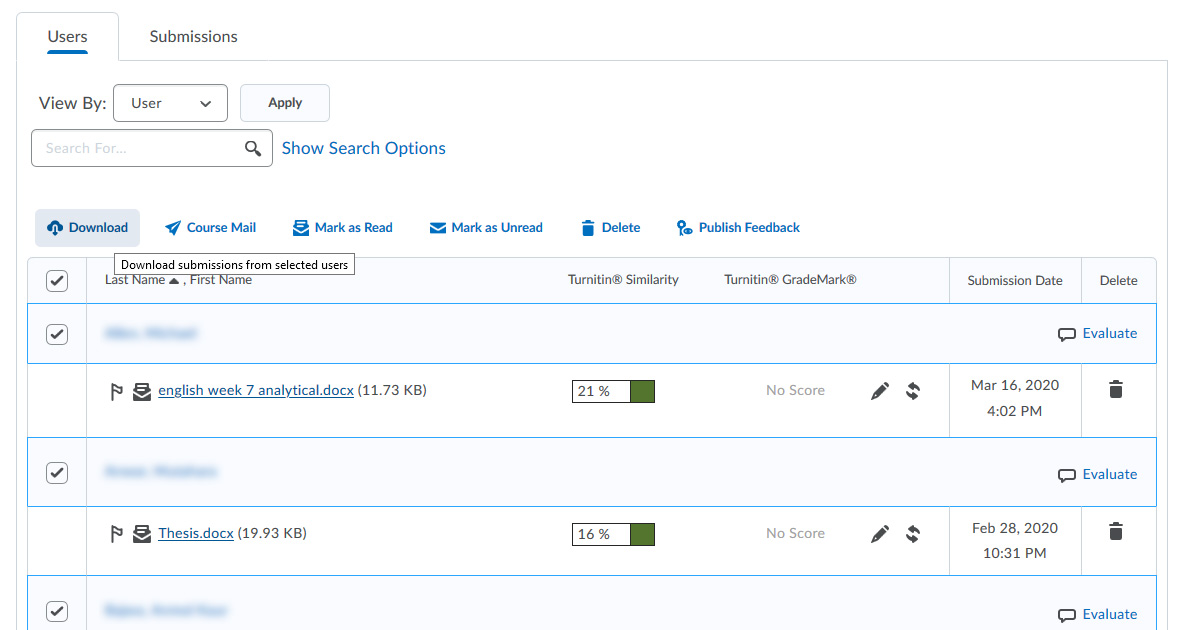
- Click the title of the assignment folder you wish to grade to view your students' submissions.
- Scroll to the bottom of the page and check whether your students' submissions are being displayed across more than one page. If they are, click the drop-down box at the bottom right and switch the view to "200 per page".
- At the top of the table of submissions, click the multi-select checkbox to select all students in the class.
- Click Download above the table.
- A dialog box will appear, displaying the message that your Zip file is being prepared. After a few seconds, the message will change to "Your file is ready to download". Click the Download button to download all of your students' files in a Zip file.
- Download the Zip file to a location on your computer's hard drive where you will be able to find it. Depending on how your web browser is configured, you may be asked where to save the file, or it may automatically be saved in a default Documents or Downloads folder.

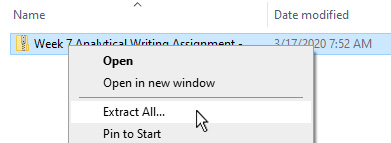
Once the file has been downloaded, locate it on your computer and Unzip the files into a new folder (don't just open them from within the Zip file, as you won't be able to save them from that location).

Do any marking and annotation that you need to perform, but make sure not to edit the numeric codes in the names of any of the files, as these must be left intact for the next step to work.

Bulk Re-Upload
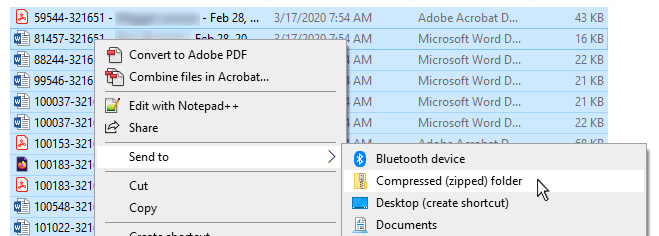
- On your computer, navigate a file explorer window to the folder where the annotated files are located. Select all of the files (not the folder they are in-- you must directly group-select all of the files), right-click on them, and then click Send To -> Compressed Folder. A new Zip file will be created within the folder that contains all of the selected files.
- In eConestoga, open your course and go to Course Tools -> Assignments.
- Click the title of the assignment folder to view your students' submissions.
- At the top of the screen, click Add Feedback Files.
- A dialog box will appear with an Upload button inside of it. Click Upload and follow the prompts to locate and upload the Zip file you just created.
- Click Add to finish uploading the Zip file.

If you're successful, the system will unpack your Zip file and distribute the annotated files to the student who originally submitted each one. The files will be added to each student's Evaluation and Feedback panel as an attached feedback file, and their feedback will be saved to Draft. When you grade the students, you will see the files waiting for you when you open each student's grading screen.