- Awards Tool
- Copying Content
- Syncing Gmail Calendar with eConestoga
- Syncing iCal with eConestoga
- Syncing Office365 Calendar with eConestoga
- eConestoga Community Shells
- Request Custom Shells
- End Dates & Controlling Course Visibility
- Enrollment & User Roles
- Keeping Your ePortfolio After You Graduate
- Grades Setup
- Merging Courses
- Publishing Your Grades
- Quiz Submission Views
- eConestoga Student Reference
- Special Access in eConestoga Quizzes
Our Guides Have Moved!
If you have bookmarks to our old guide site, please update them!
You can find this guide in its new location here:
Merging Courses
Merging Courses
UPDATE Fall 2023: Merging courses is now an immediate, self-serve process! Read on for details about how the new merge tool works.
What is merging? 
By default, eConestoga courses are built section-by-section. If you teach three sections of a course, you get three separate eConestoga course shells.
However, some instructors prefer to manage all of their course sections within a single course shell. This is called merging. The single shell will contain all of the students in your various sections, and you will need to upload content into it only once.
Should I merge my course?
- Merged shells are most appropriate for cases where students are broken into multiple sections on paper, but function as a single class in practice. A common example is courses where international and domestic students are enrolled in different sections or different course codes, despite sitting in the same classroom.
- They can also work well for an instructor who teaches distinct classrooms of students, but doesn't mind having all of their sections access the same assessments with the same dates. A good example would be a class where all assessments are due at the end of the week regardless of the day of the class.
- Merging is much more awkward if you wish to have your students complete the same assessment on different dates, or different assessments entirely. Trying to manage that within a single merged shell is generally very difficult.
- Group work can also be fairly complicated in a merged shell, as the system does not have easy ways to prevent students in different sections from mixing together.
- Merging should never be done after students begin interacting with a course. You will lose student activity (quiz attempts, assignment submissions, discussion posts, entered grades, etc.) once you merge. Therefore, if you wish to merge your sections, you should create the merge before the start of the semester.
Merging your courses
The process for merging courses is now completely self-serve!
Note that you must wait for your individual section shells to be created before you can merge them; live shells for any given semester are typically created starting about six weeks before the start of that semester's classes.
To merge your courses,
- Open the eConestoga Instructor Tools utility course that all faculty are enrolled in. The course should appear on the Permanent Courses tab of your My Courses tileset on the eConestoga homepage.
- Find the Self-Serve Course Merge Tool, and click Get Started.
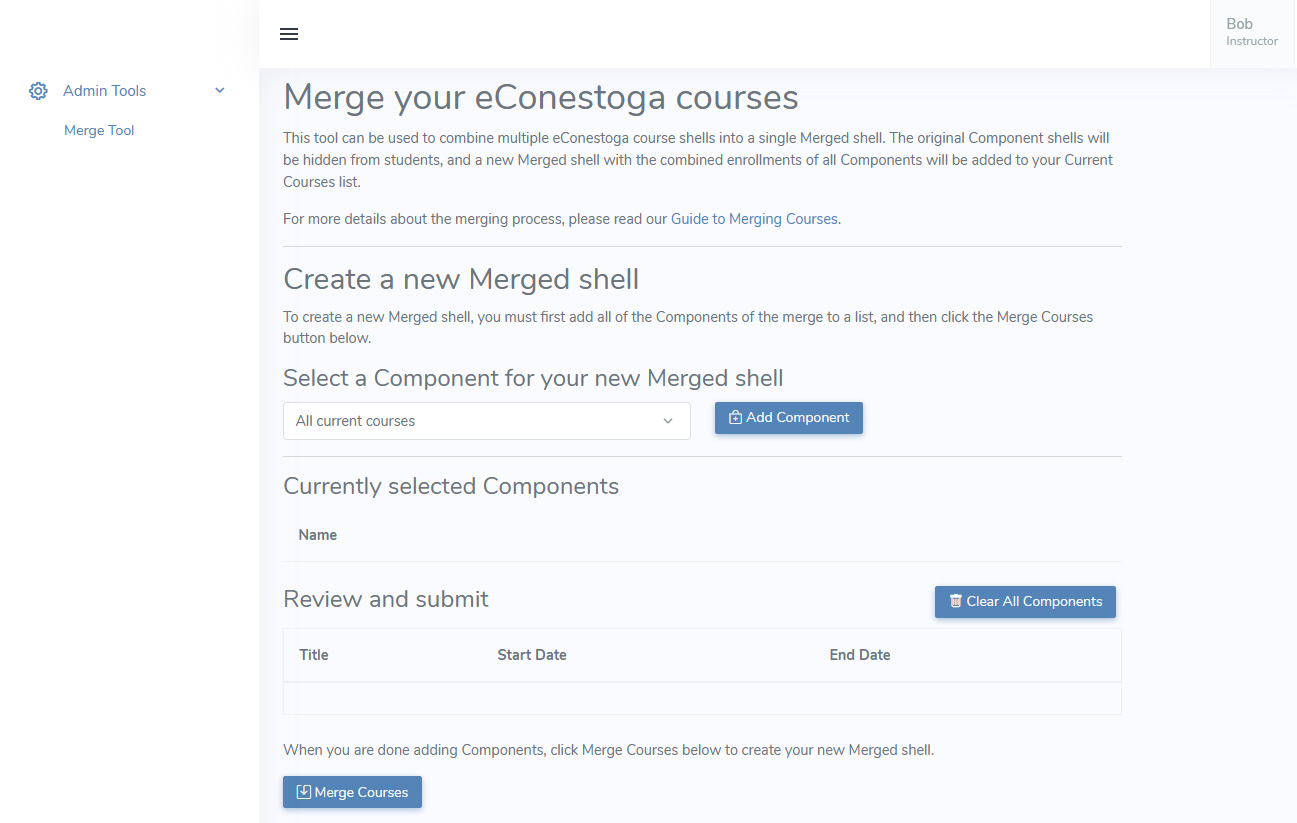
- A new tab will open. After a short delay, you will land on this page:
- Add the individual section shells you wish to combine:
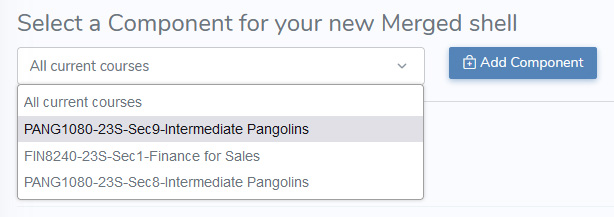
- Under the "Select a Component" heading, click the All Current Courses drop-down. You should see a list of courses that started recently or will start in the near future.
- Click on one of the components you wish to merge, then click Add Component.
- Repeat the previous step until all components you wish to merge together are selected. A merged course can contain as many components as you want.
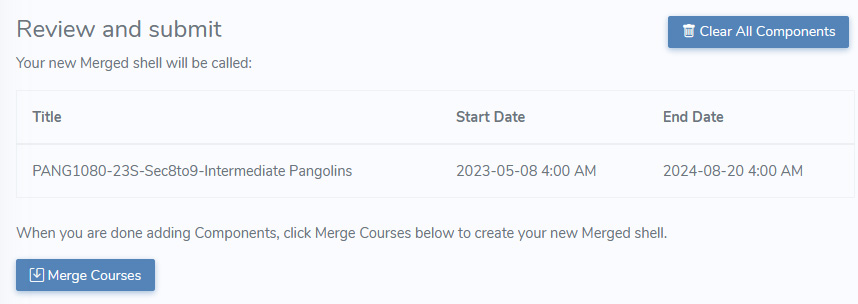
- Review the merge that will be created. The system will show you a preview of the merged shell's title, and will indicate the start and end dates of the shell.
- Note: If the Start and End dates of the components don't match, the merge tool will use the earliest Start Date and latest End Date among all the sections.
- Once you're satisfied that your selection is correct, click Merge Courses to create your merged shell.
- If you are merging courses after the Start Date has passed, you will receive a notification informing you that student work from the individual sections will not carry forward to the merged shell. If you're okay with that, press Yes, go ahead.
The merging process can take up to a minute to complete. Once it's done, your new merged shell will immediately be available to you in eConestoga, and all of the component shells will be made invisible to students. You as the instructor will continue to see both the component sections and the merged shell, but students will only see the merged shell.
Merged shells can be distinguished by their unique titles:
- If you merged sections of the same course code, the title will take the form PANG1080-23S-Sec8to9
- If you merged courses with different course codes, the title will take the form PANG1080&1880-23S-Sec3
Editing a merged shell
If you merge sections together and then your section assignments change, you can edit your merged shells to add or remove sections.
- Open the eConestoga Instructor Tools utility course.
- Under the Self-Serve Course Merge Tool heading, click Get Started.
- Scroll down to the "Your Existing Merges" heading. Locate the merge you wish to change, and press the Manage button.
- The page will reload, and you will see the current components of that merge listed. Make any changes that are needed-- either click Remove beside any sections you are no longer teaching, or use the Select a Component drop-down to add new sections.
- Once you're satisfied with the new components of the merged shell, press the Update Courses button and wait for the system to process the change.
Un-merging
If you change your mind about merging your sections, you can un-merge your sections to revert to using the individual section shells.
- Open the eConestoga Instructor Tools utility course.
- Under the Self-Serve Course Merge Tool heading, click Get Started.
- Scroll down to the "Your Existing Merges" heading. Locate the merge you wish to deactivate, and press the Manage button.
- The page will reload, and you will see the current components of that merge listed.
- Click the Deactivate button.
- A confirmation prompt will appear. If you're sure you wish to unmerge your courses, press Yes, unmerge the course.

If you change your mind again and wish to re-merge your sections, you can do that quickly by scrolling down to the "Deactivated Merges" section at the bottom of the page, pressing Manage, and then following the same steps you used to un-merge the shell, except that the button at step 5 will be labeled Reactivate.
Importing grades at the end of the semester
At the end of the semester, faculty are required to import their grades from eConestoga into the Employee Portal and submit them to their Chair. Under the old merging system, grades couldn't be automatically imported for merged courses, and faculty instead needed to type their grades manually into the Employee Portal. Under the new self-serve system, we have added a way to make your grades available to the auto-import system.
Note that this process should be completed after your grades are completely finalized, but before you go to the Employee Portal to import grades.
- Open the eConestoga Instructor Tools utility course.
- Under the Self-Serve Course Merge Tool heading, click Get Started.
- Scroll down to the "Your Existing Merges" heading. Locate the merge whose grades you want to import, and press the Manage button.
- The page will reload, and you will see the current components of that merge listed.
- Click the Sync Grades button.
Your students' final grades will be copied from the merged shell to the individual component shell they're enrolled in, where the automatic grades import tool will be able to find them.